Specifications and Key Features
Overview
The Overview tab comes by default in our theme. You don’t have to create a new tab for this or change any settings. The Overview content is also known as product description.

Change Product Overview
-
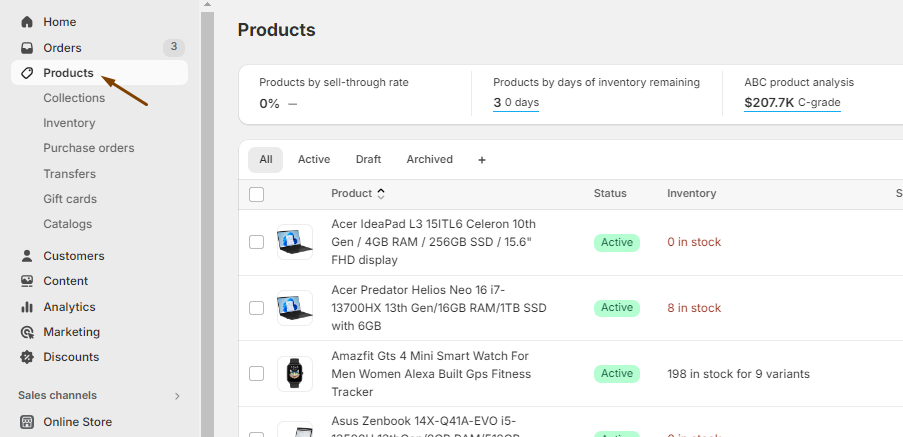
To change the product overview or description, go to the products list in the admin panel.
-
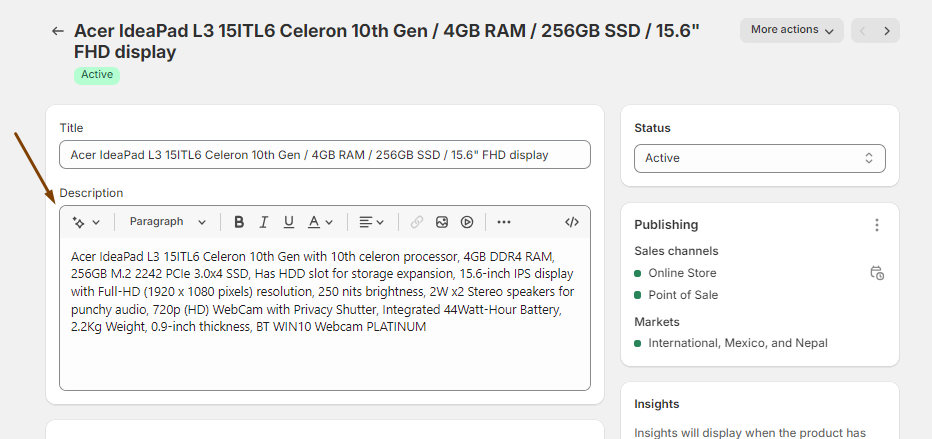
Choose any product whose overview you want to change. You will see this product update page with the description field. Add or change any part of your product description and then hit the ‘Save’ button.
Specifications
You can add specifications for a particular product. Our theme by default comes with the Specifications tab in the product page. All you need to do is create metafields for specifications, create specs category blocks and add metafield keys in these blocks.
Create Metafield Definitions
-
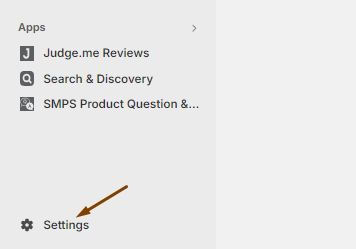
In your Shopify admin panel or dashboard, you will see ‘Settings’ on the bottom left corner. Click on it.
-
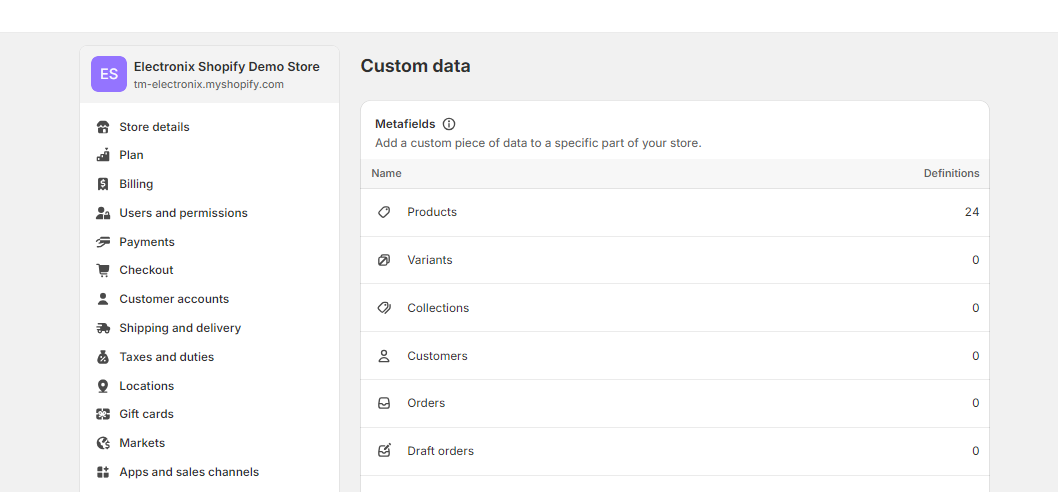
On the Settings modal, you will see ‘Custom data’. Click on it and you will see various resource types on which you can create metafields.
-
Since you are creating metafields for products, choose the ‘Product’ option and then click the ‘Add definition’ button.

-
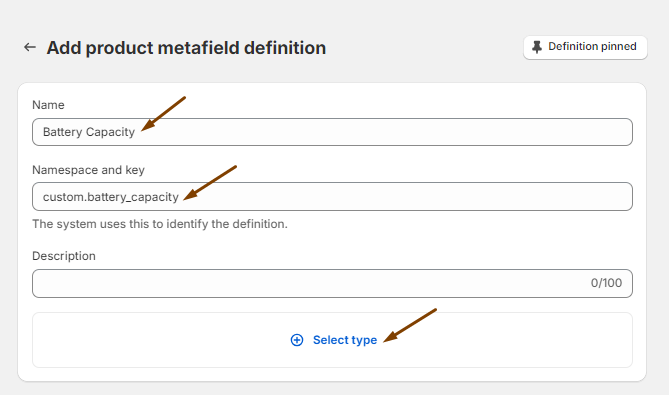
Three fields are mandatory and all else are optional.
- Add a name for the metafield
- Namespace and key will be auto-generated based on the name you typed. You can change namespace and key if you want.
- Then, from the ‘Select type’ field, choose the ‘Single line text’ option. You can add a description if you want but it’s optional.
-
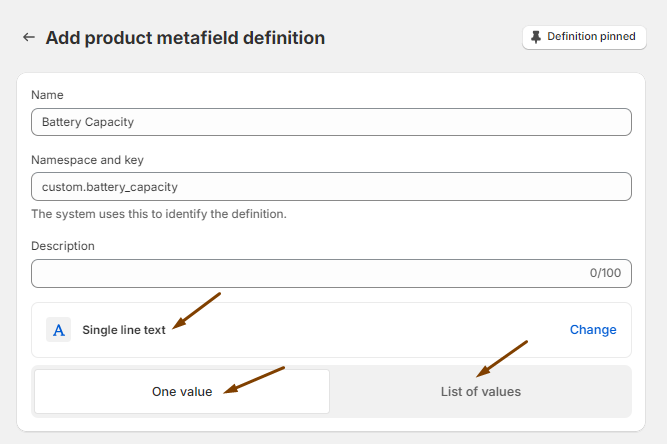
Choose the ‘One value’ option if your metafield has a single value. If it’s a list of values, choose the ‘List of values’ option.
-
Finally, hit the ‘Save’ button and your metafield definition is created.
Add Metafield Value
After creating a metafield definition, it’s turn to add a metafield value.
-
Go to the products list in your admin panel and then choose any product to which you want to give a metafield value.

-
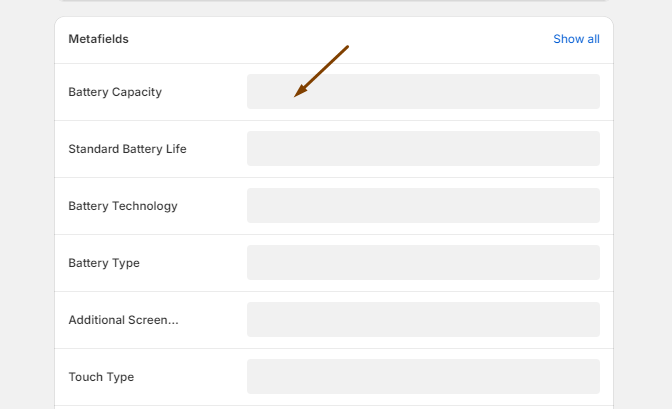
Go to the bottom of the product page in your admin panel. You will see various metafields created for your products. Click on the gray box and add a value or a list of values to each metafield. Then, hit the ‘Save’ button.
Create Specs Category Blocks
After creating metafields and giving them values, you will need to create ‘Specs Category’ blocks and add metafield keys.
- Go to any product page in your theme editor. In the 'Product Tabs' settings, you will see the 'Specs Category’ block under the 'Specifications' block.
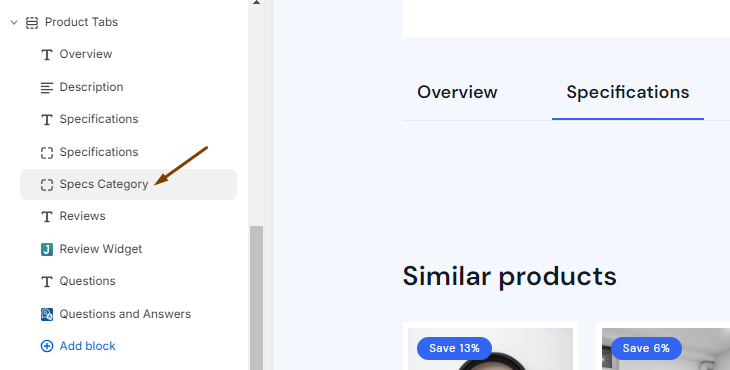
- Click on the ‘Specs Category` block and you will see its two settings.
-
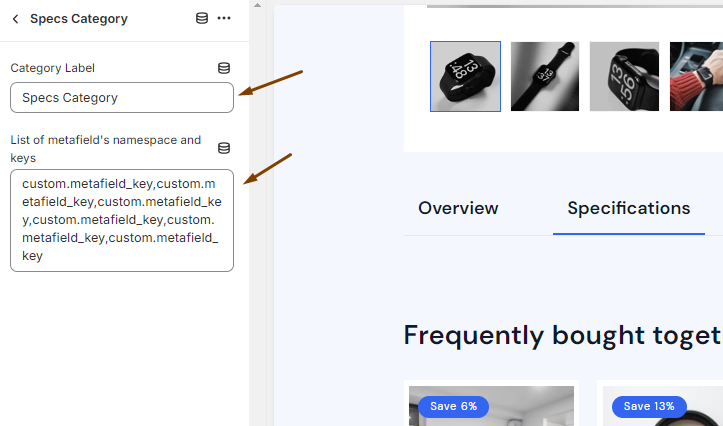
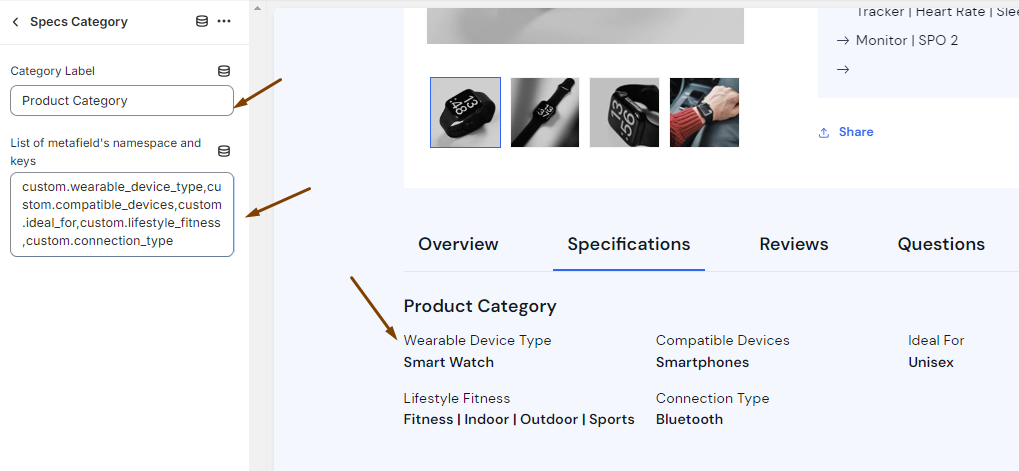
The Category Label field is to give a title to a set of specifications.
-
The list field is to hold a list of various metafield namespaces and keys. These metafields hold various specifications (keys and values).
-
The list field is prefilled with some values. They inform you of the format that you need to follow when you add your own metafield namespaces and keys. You will need to add a pair of namespace and key separated by a dot and all these pairs must be separated by a comma. No spaces.
-
We’ve designed our Specifications tab in a way that you can group together related specifications and give this group or category a title. But if you want to keep all specifications in a single group or block, you are allowed to do so.
-
-
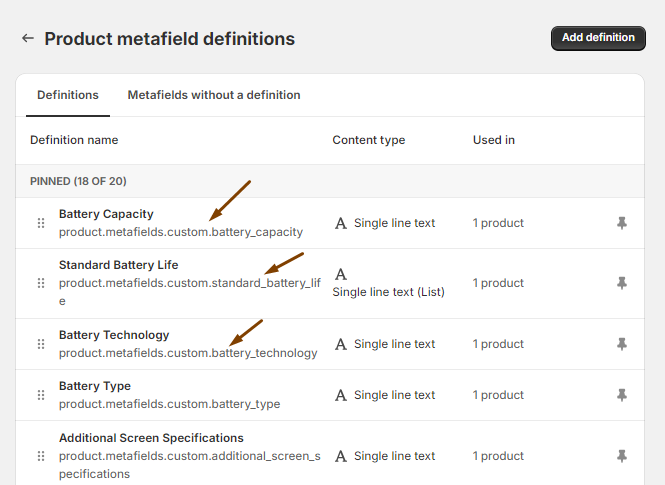
You can find your metafield namespaces and keys from the same place where you create metafield definitions. You don’t need ‘product.metafields’, just namespace and key.
-
Once you add the label and the list of metafield keys, you will instantly see the specifications on the theme editor. Note: if your metafield doesn’t have a value, it won’t be shown in the specifications.
-
Then, hit the ‘Save’ button.
-
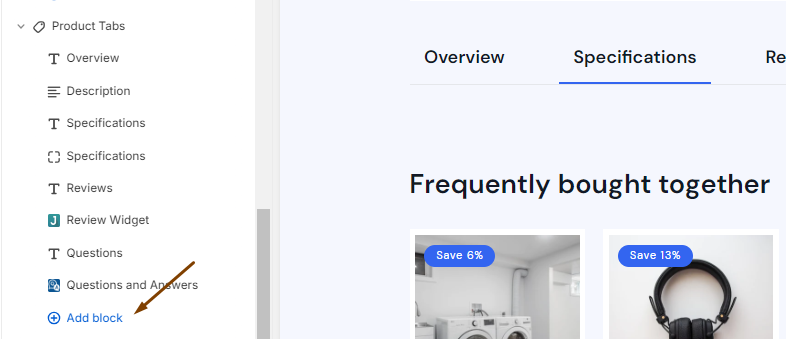
If you want to create another 'Specs Category' block, click on the 'Add block' option.
-
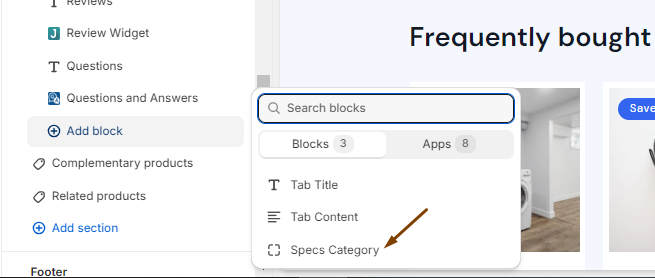
From the list of available blocks, choose ‘Specs Category’ and your block will be created.
-
Then, follow the steps we just described above.
Key Features
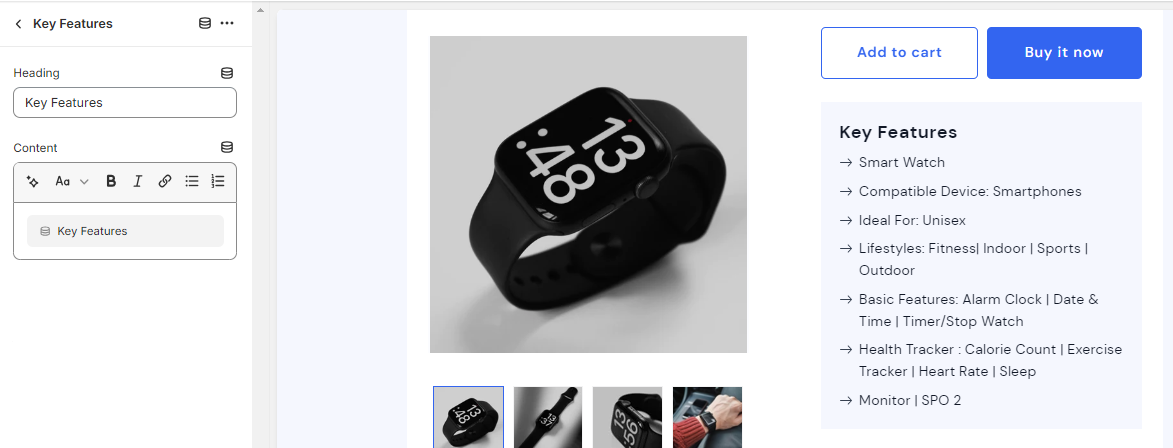
We have a block called Key Features to show the chief qualities of a product. To use it, you will need to create a metafield.
-
In your admin panel, go to the place where you can add metafield definitions.
-
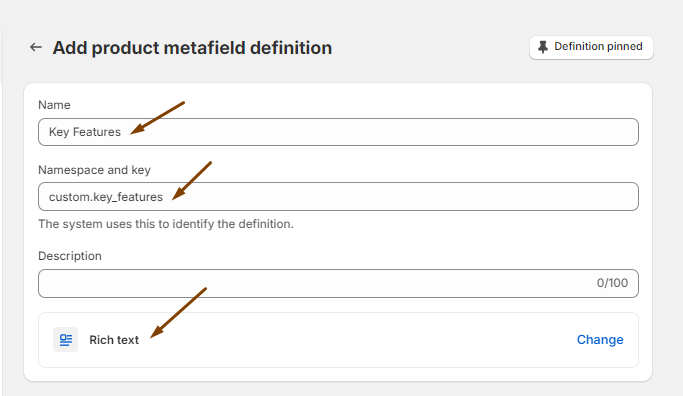
Give the name of ‘Key Features’ to the metafield. And in the type field, select the ‘Rich text’ option. Then, hit the ‘Save’ button.
-
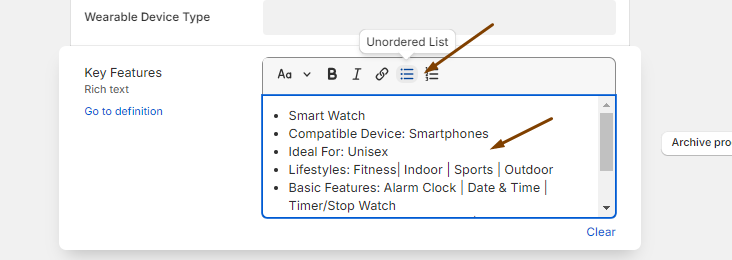
Go to the admin page of a product whose key features you want to add. Move down to the bottom of the page and you will see the Key Features metafield. Click on the gray box and write or paste the features. Put the features in an ordered or unordered list. Then, hit the ‘Save’ button.
-
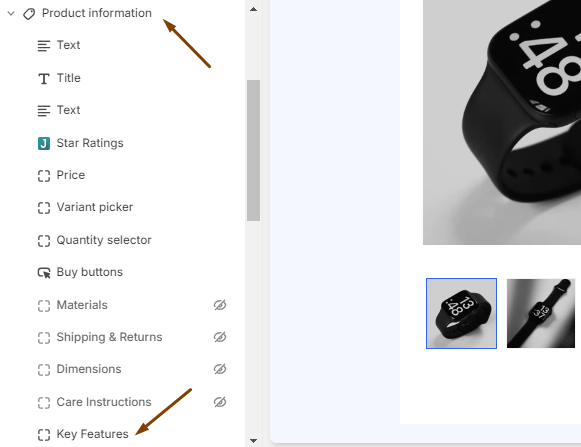
Go to the theme editor and select any product. In the product page settings, under the Product information section, you will see a block named Key Features. If it’s not there, you can always create another ‘Key Features’ block.
-
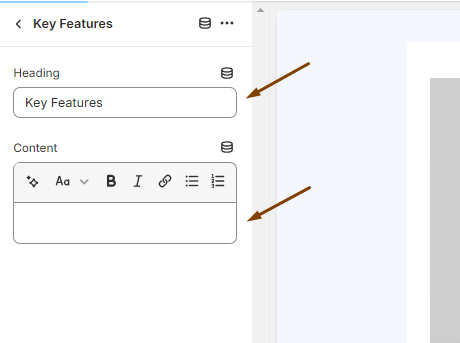
Click on the ‘Key Features’ block and you will see its settings. The block has two settings. The first is a title. And the second is a content.
-
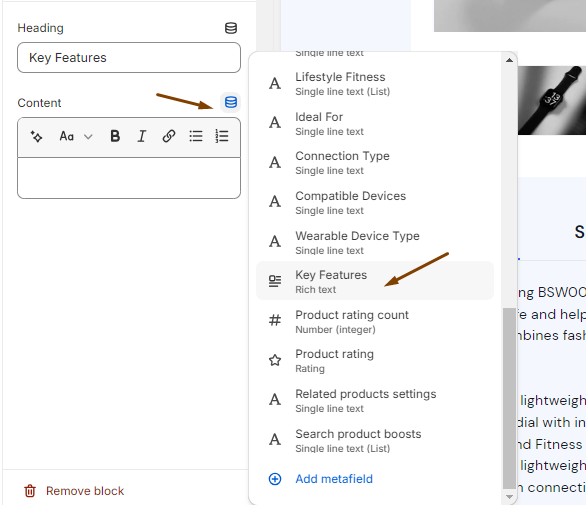
Click the cylinder icon of the content settings. This opens a list of available metafields. Choose the ‘Key Features’ option.
-
Once you choose the option, the key features will be shown in the product information section. Then, hit the ‘Save’ button.
